.png)
How to Install your Nødz Device
For personal protection and property safety, please read the manual and ensure complete
compliance during the entire installation process.
To get an electronic version of the manual please visit https://help.moduly.io/documents/useful-documents
If the system design requires optional items, please review each associated instruction set to complete installation. Make sure all necessary tools and materials are available before starting the installation process to avoid any inconvenience on site.
Disclaimer
Locate a suitable spot where you can place your Moduly NødzTM without having to move it again. Exercise caution as it is a heavy object.
Follow this step-by-step guide to install your Nødz device.
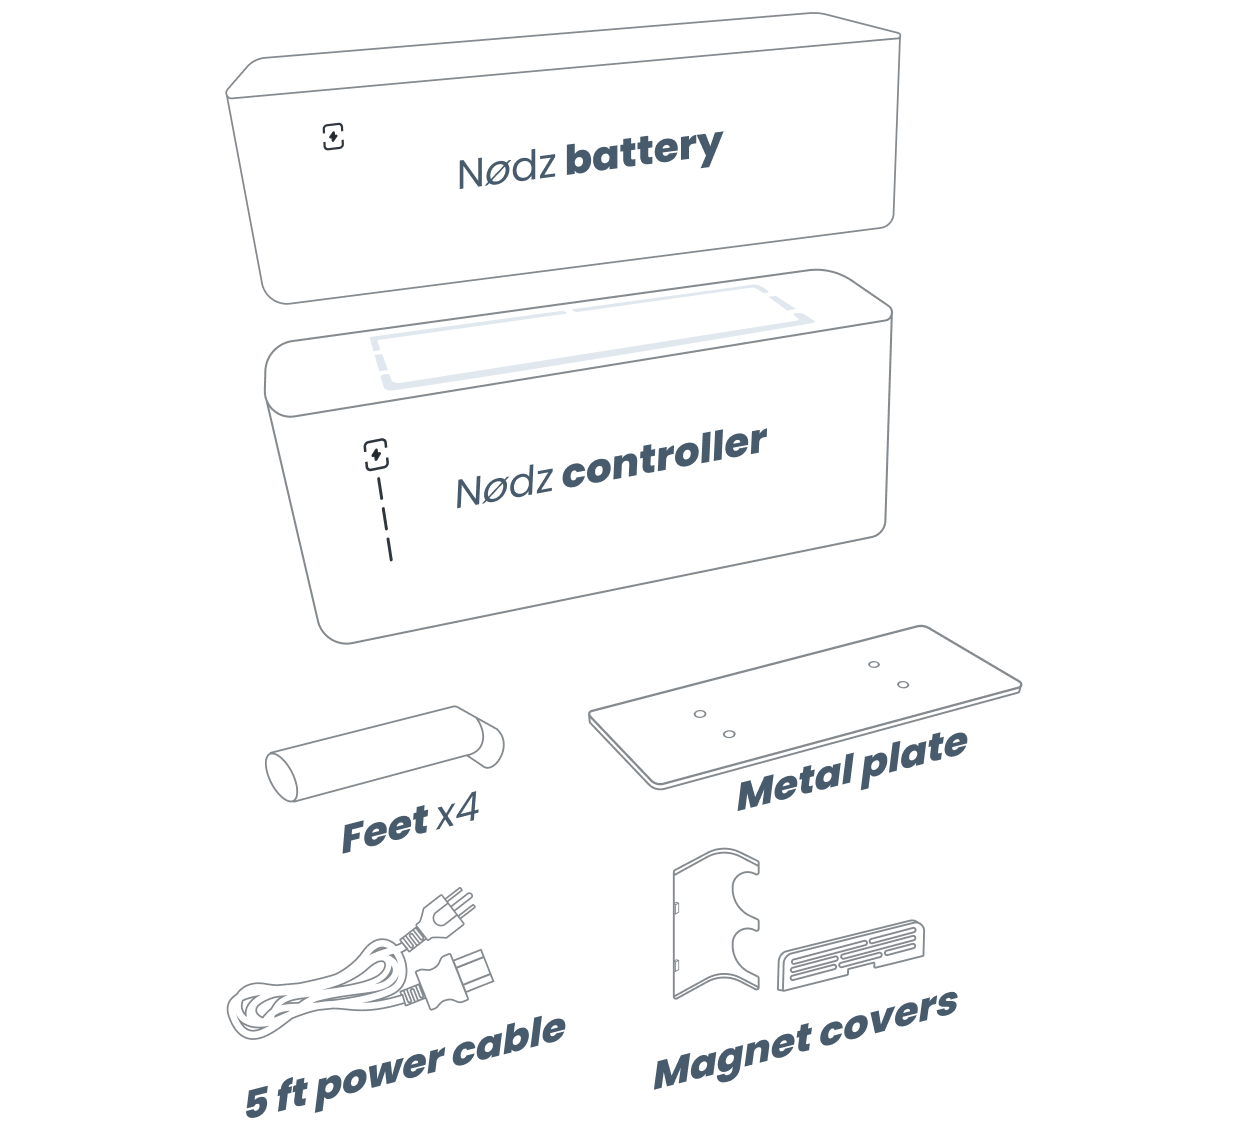
Equipment
Locate a suitable spot where you can place your Moduly Nødz™ without having to move it again. Exercise caution as it is a heavy object.
Step 1
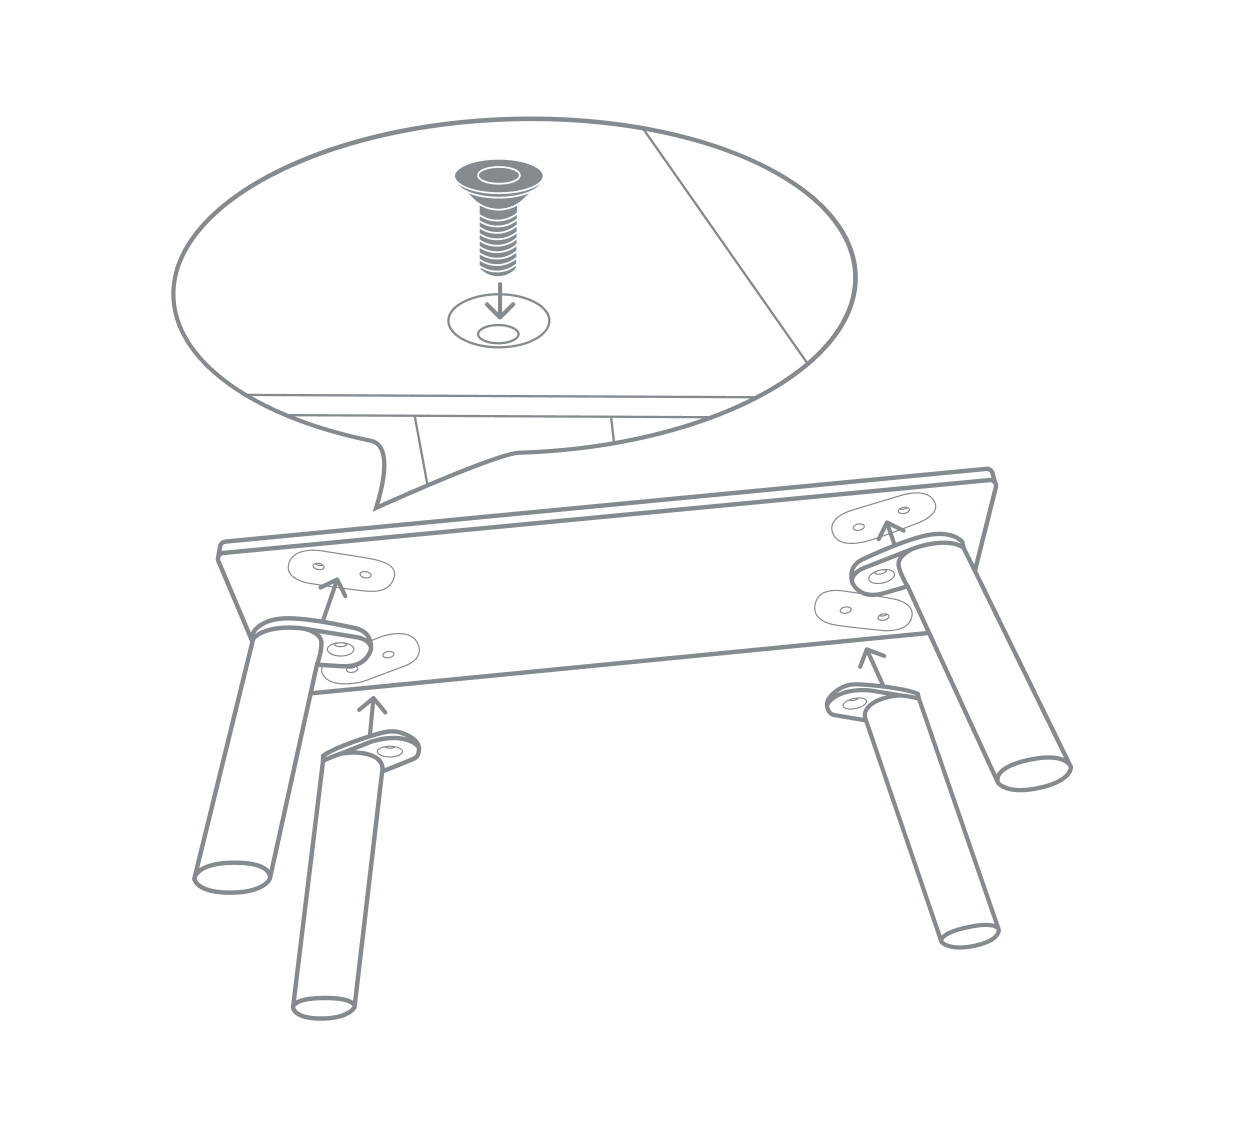
Using the supplied toolkit, secure the legs onto the metal plate by screwing them tightly.
Step 2
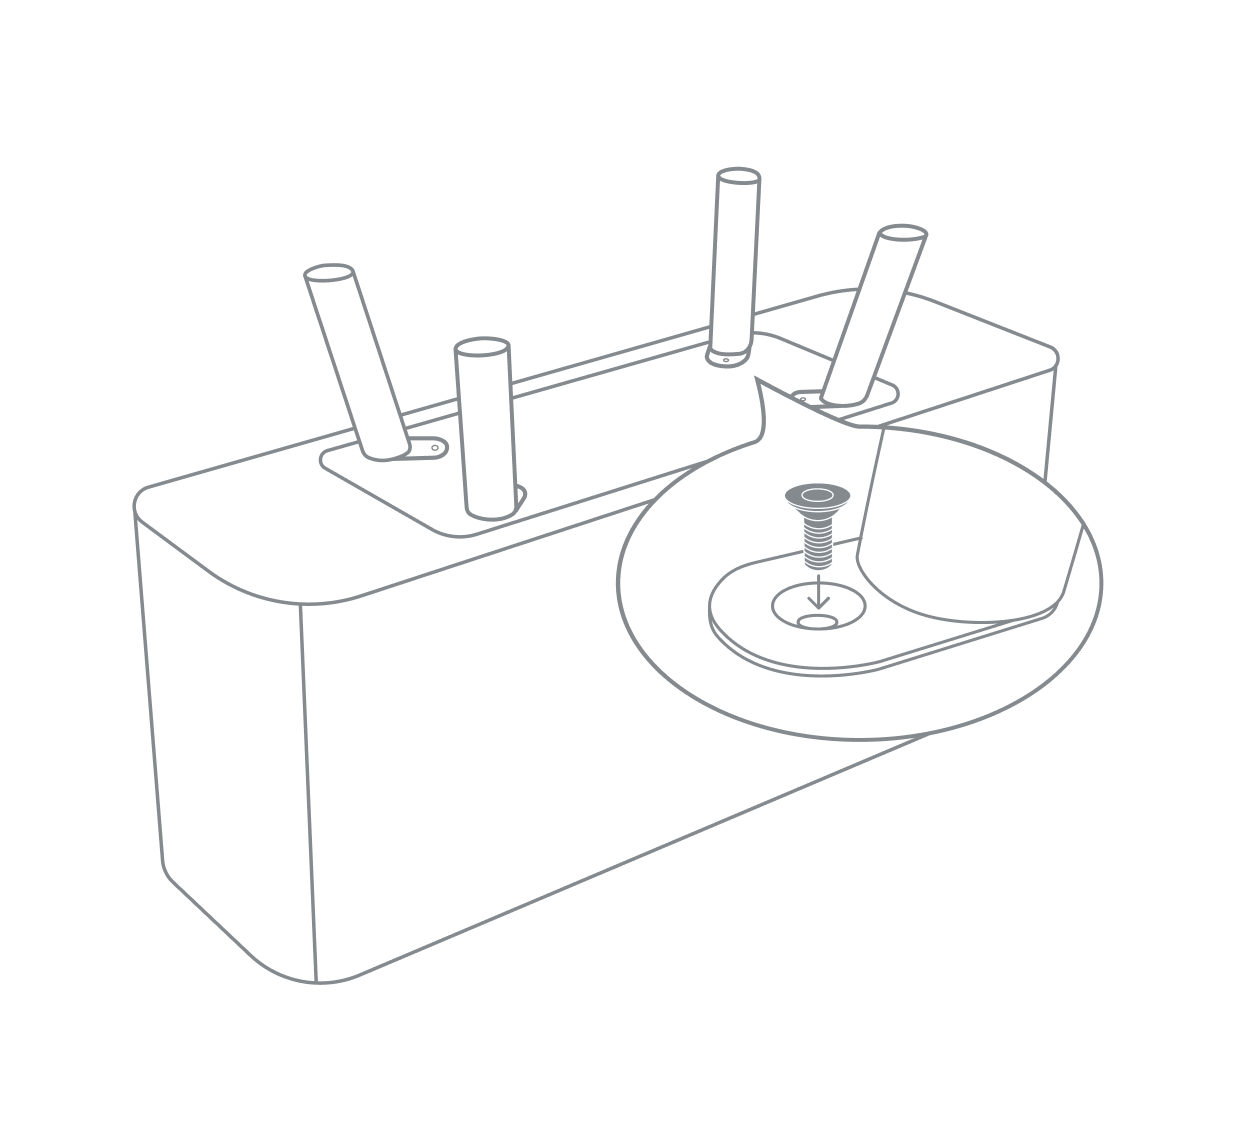
Screw the metal plate to the bottom of the Moduly Nødz controller™.
Step 3
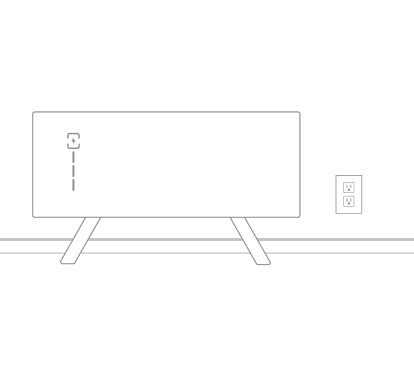
Place the Moduly Nødz controller™ against the wall within 4.5 ft (1.30 m) of an electrical wall outlet.
Step 4
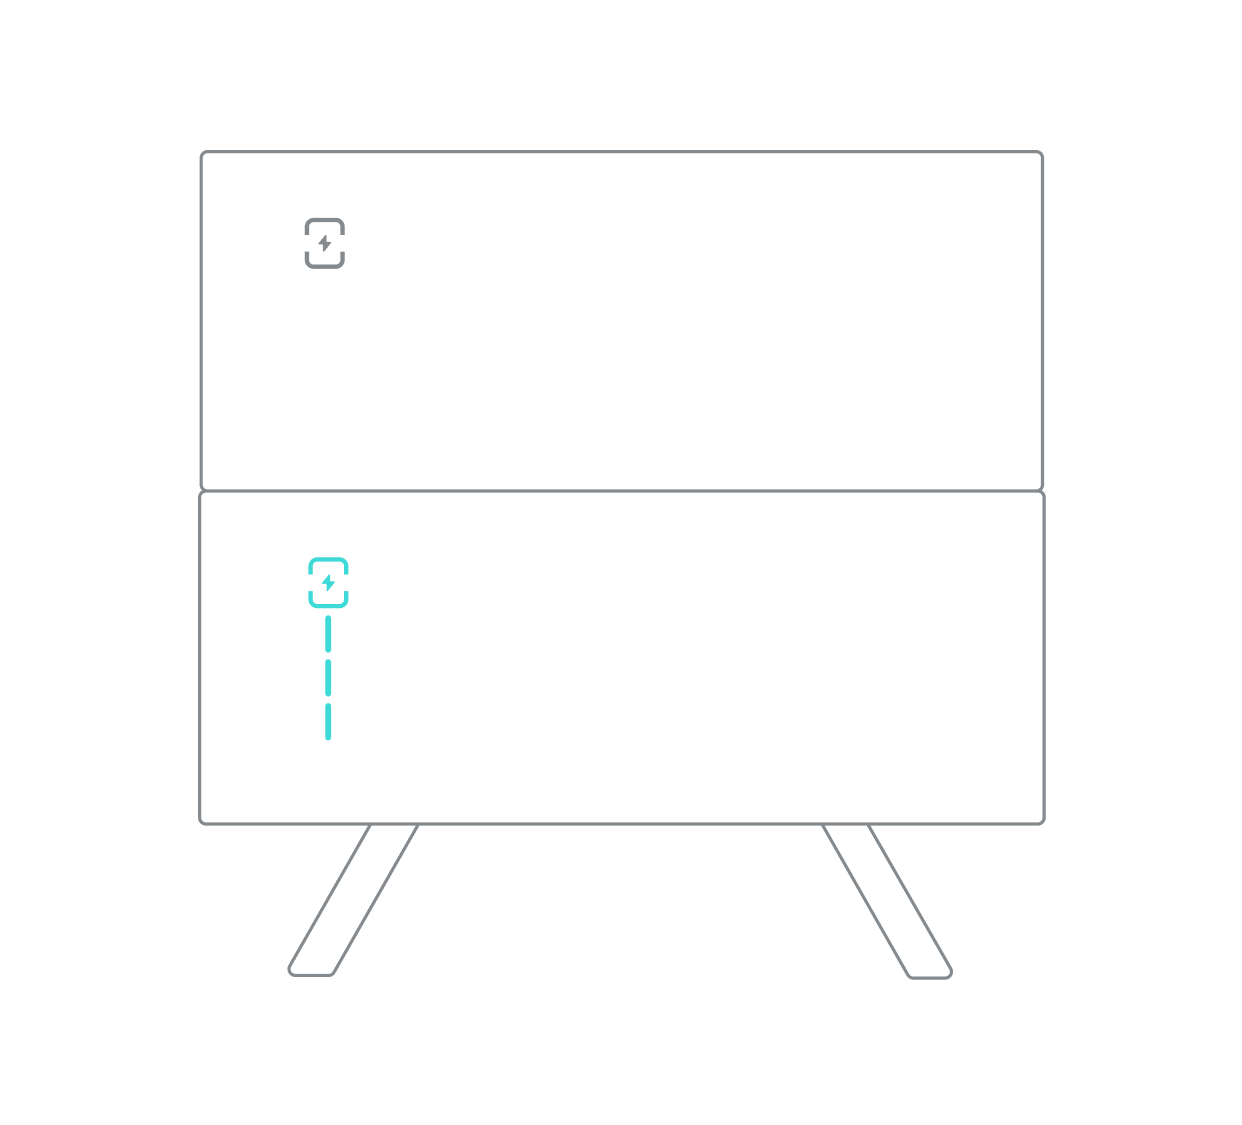
Firmly seat the Moduly Nødz battery™ on top of the Moduly Nødz controller™.
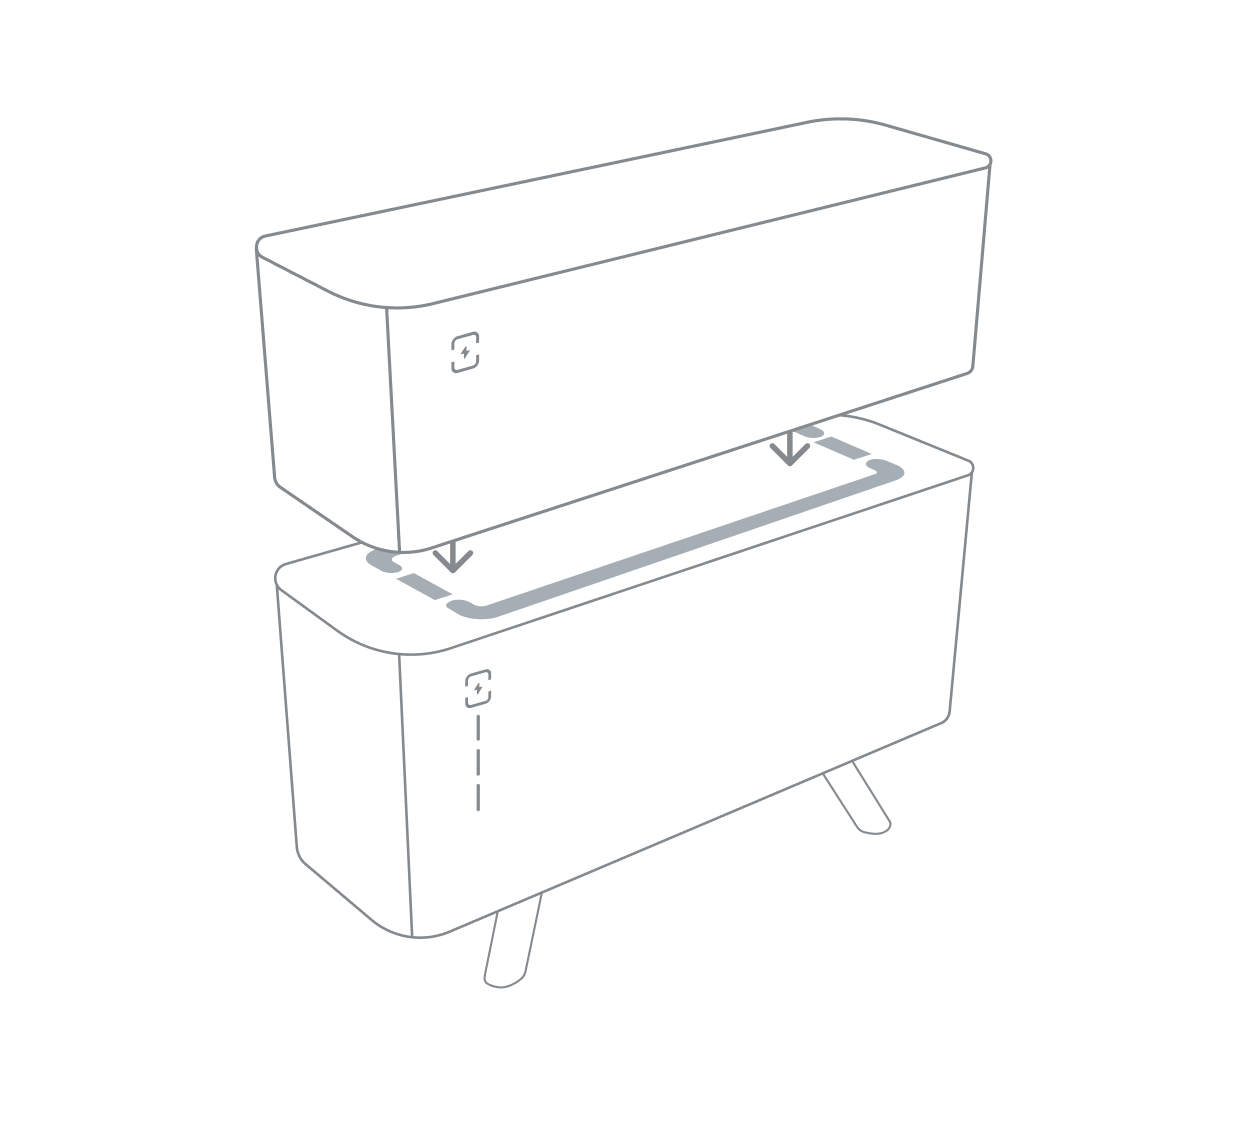
Step 5
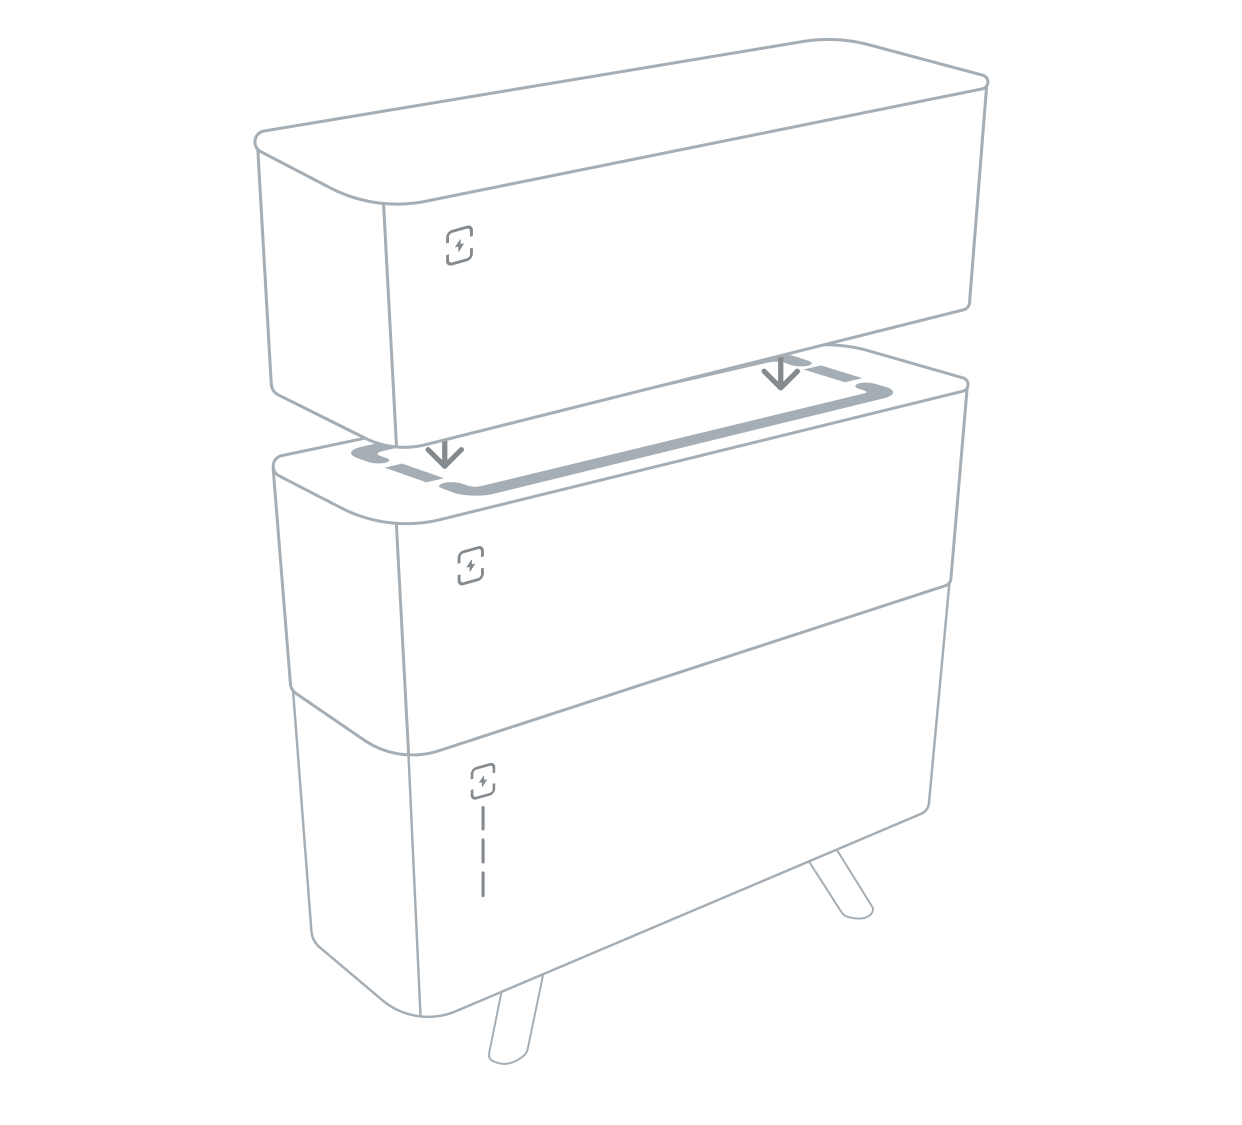
Depending on the capacity of your Moduly Nødz™, you may have several Moduly Nødz battery™ modules to stack. The topmost battery has a flat top cover with no connectors present.
NOTE: Ensure complete compliance with the regional building codes when installing the anchor bolts.
Step 6
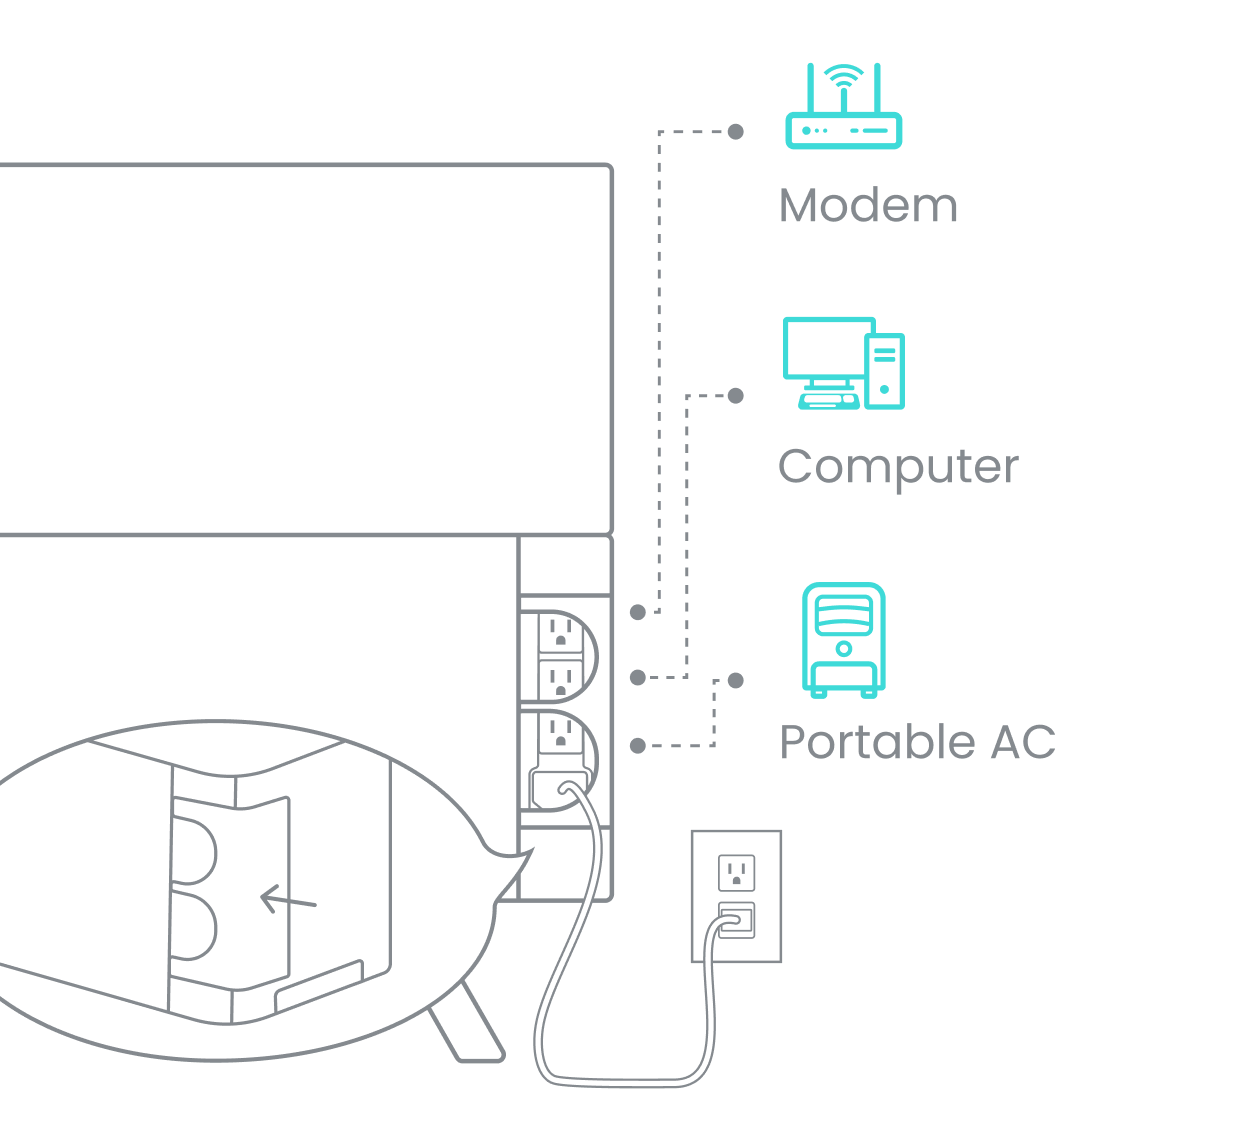
Plug the AC power cable into the appropriate port on the Moduly Nødz controller™, then plug the connector into your residential electrical wall outlet.
Place the magnetic cover on the side of Moduly Nødz controller™.
Step 7
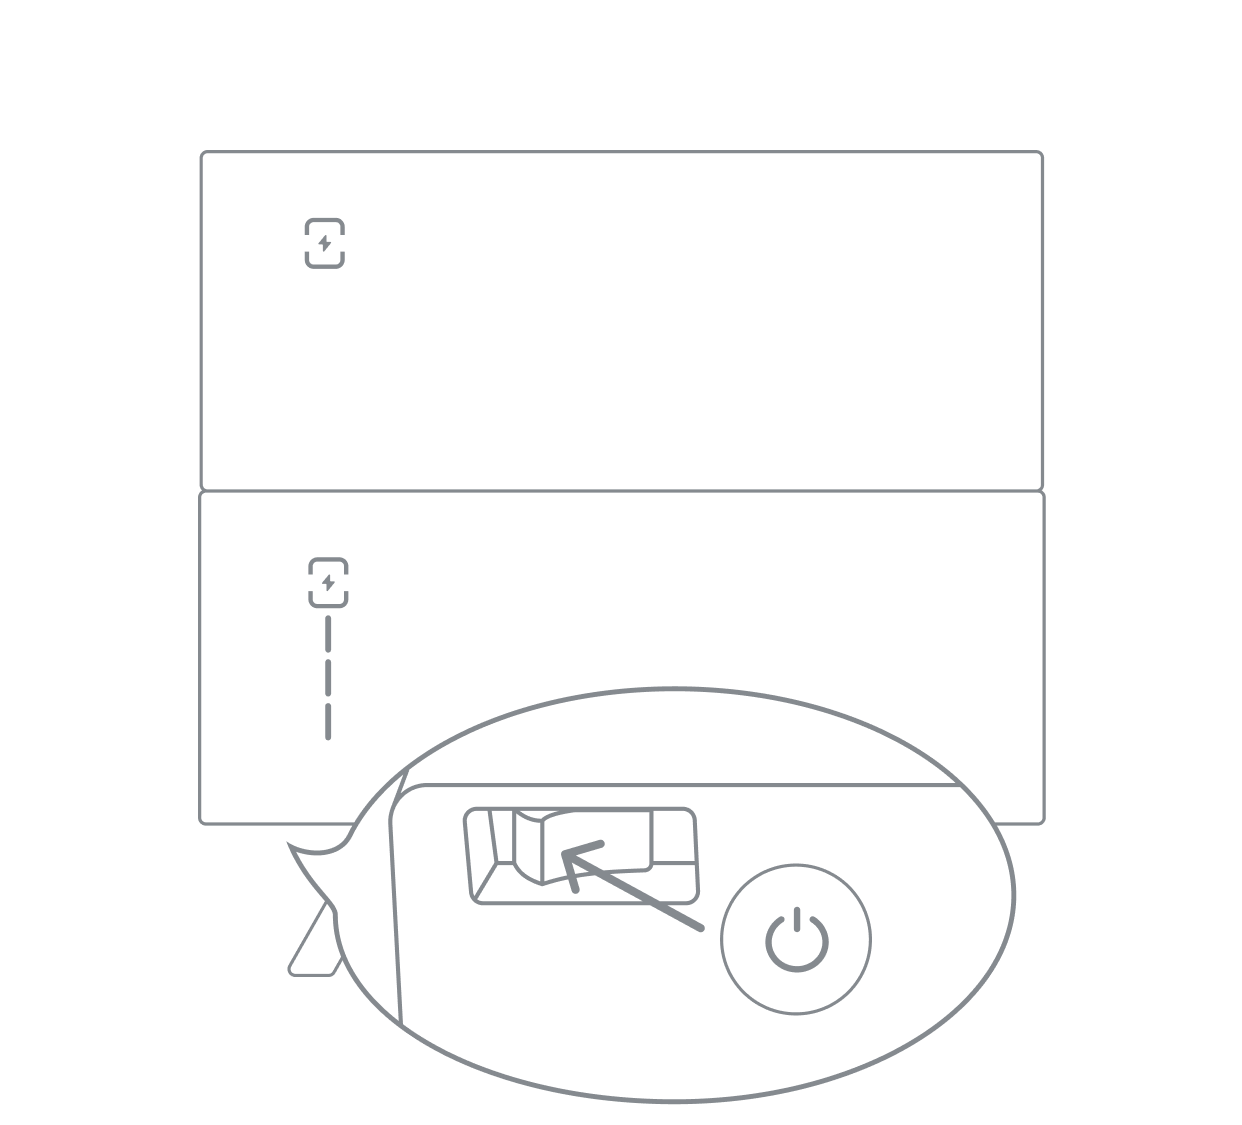
Switch on the Moduly Nødz™ unit by pressing the power button located in the left corner under the Moduly Nødz controller™ unit.
You are all set!
You are ready to proceed to the next step using the mobile application.